Friday, April 22, 2011

Decorate Rich...High Style for Less

!: Decorate Rich...High Style for Less

It's easy to create luxurious spaces when you have unlimited funds. For most of us, however, the phrase "money is no object" is not in our vocabulary. Champagne and caviar style CAN be achieved on a beer and pretzel budget. All it takes is a little imagination and creative resourcefulness to transform the ordinary into the extraordinary!

Whether your home is a castle or condo, mansion or module, use these tips to turn your living space into a showplace - without breaking the bank!

Details Make a Difference: Transform your home from builder basic to handcrafted custom with the addition of architectural trim work. Install or upgrade trim and moldings such as door and window casings, crown moldings, wall treatments, picture rails, base trim, etc. A quick trip to the lumberyard or home center will enlighten you to a variety of options and styles. Such architectural detail not only adds character and charm to a home but also conveys an image of quality and wealth.

All The Trimmings: Just as simple moldings can transform hard surfaces - fabric, trimmings, beads, tassels and fringe can make store bought soft furnishings look more expensive. Create "designer" window treatments by adding contrasting trim to ready-made window panels. Attach bullion fringe to a tapestry fabric remnant for an elegant throw. Make real fur pillows for an old mink stole. Use yards of sheeting in coordinated prints and solids to fashion curtains, table skirts, duvet covers and shower curtains. Hot glue bead trim to lamp shades for a touch of whimsy and sparkle.

Off the Walls: Think you can't afford an original masterpiece? Create one-of-a-kind works of art from everyday objects. An old china plate, mismatched silver spoons, rusty keys, embroidered hankies, pressed leaves, post cards, pages from a book or calandar - almost anything you can think of - can become a unique piece of art when matted and framed. The local craft store carries a variety of picture frames and pre-cut mats to fit any decor. Unify mismatched items by keeping the mat and frame the same size and color. Add prominence to a small object by framing in a shadow box. For the greatest impact, group several like items together on a single wall.

Mix Don't Match: Nothing shouts humdrum like a room full of matchy-matchy furniture right off of the showroom floor. Don't be afraid to mix flea market finds or family heirlooms with a few new quality pieces. Although finishes and furnishings should relate to each other, they do not have to match or be of the same era, quality or price. Combine high and low end design pieces gathered over time for a style that looks rich, expensive and uniquely you.

Remember, true decorating satisfaction comes from creativity - not cash. It's not what you have - it's how you use what you have that makes the difference between rooms that fall flat and rooms that feel fabulous!


Decorate Rich...High Style for Less

!: Saved Lifeguard Board Shorts !: Binoculars 12x60 Grand Sale

Friday, April 15, 2011

Cheap Home Decor - Great Ideas to Make Your Sample Board

!: Cheap Home Decor - Great Ideas to Make Your Sample Board

Before you try to turn your color scheming ideas into reality, put them down on paper. A sample board is the tool used by professional interior designer to create a visual impression of an entire room, from paint color to furniture to Accessories, in a form that they can present to their clients for approval. Even if you have only yourself to please, making a sample board can be time well spent, preventing costly decorating mistakes.

It is a lot cheaper to swap one tiny fabric swatch for another than to get your sofa re-covered. And if you are at all unsure of how to mix and match colors, it is an invaluable way of focusing your ideas and providing further inspiration.

Find a sheet of A3 paper or card to use as a base, then collect samples of all the furnishings you plan to include in your room. Pin them all to the card, and then swap them around or add others as your ideas evolve to see how different color combinations work together. When you feel you have a complete picture of your room and are happy with the overall effect, glue everything in place and use the board as a blueprint for your scheme. Here you have what to include on your board:

Paint shade cards

They can be picked up from DIY stores. Include colors for all the paintwork in the room - ceiling, woodwork and any furniture you plan to paint - as well as the walls.

Carpet and flooring samples

Carpet and flooring samples are also freely available. Small pieces of wooden flooring can be useful for representing the wood tones of furniture.
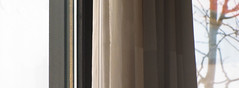
Fabric swatches

These swatches are usually available on demand at furnishing stores. Include larger samples for big items such as curtains and sofas, smaller ones for cushions.

Snippets of trimmings

Such as piping or beading are also important as they add to the character of a room.

Photos of furniture and Accessories

Photographs will help to give the complete picture. Take your own photos of existing feature of the room, and use cuttings from magazines and brochures for pieces you plan to buy.

Materials that suggest the mood

Certain materials might help to inspire you further. For example, a feather might conjure up the delicate feel you want for your bedroom. Sample boards are also known as "mood boards". What you are aiming for is an effect that excites and pleases you.

A scale drawing of the room

This will help you plan the layout. Add measurements so that you can calculate quantities for furnishings when the time comes to buy.


Cheap Home Decor - Great Ideas to Make Your Sample Board

!: Wolf Ovens And Ranges Ideas

Tuesday, April 12, 2011

Embellish Your Room With Designer Trim

!: Embellish Your Room With Designer Trim

Decorating, in its simplest terms, is all about embellishment-fluffing the pillow, if you will. Work with what you have and make it look the best you possibly can. However, sometimes to embellish, a room calls for reinforcements. But, it should also be noted; reinforcements can come in all shapes and sizes.

Of course, brand new furniture, drapes, and paintings are going to embellish a room. That being said, though, you don't need to splurge on all that to accentuate your room. Sometimes, all you need to do is fluff that pillow. Or, in this Case, your current couch, drapes, or lampshades. A designer trim might be just what you need to embellish your room.

Passementerie is the art of making elaborate trimmings of applied braid, gold or silver cord, embroidery, colored silk, or beads for clothing or furnishings. In other words, the gimps, braids, fringes, tassels, and tiebacks you see on furniture, drapery, and pillows took a skilled artist to produce. And, by a utilizing hand-crafted designer trim, you can make your current couch, drapes, pillows, and lampshades look brand new.

Designer trim provides the finishing touch to a skillfully designed interior. It enhances your furniture, drapery, pillows, etc. And, that type of attention to detail can speak volumes about a room. Don't overlook the small stuff. People notice and, perhaps more importantly, respect attention to detail. Sometimes you just need and to add a little extra to what you already have. Sometimes you just need to fluff the pillow a little bit instead of buying a new one entirely.


Embellish Your Room With Designer Trim

!: Last Minute Kid S Games !: Narrow Running Shoes Discount

Monday, April 4, 2011

Making Earrings With Beads, Ear Wire, and Eye Pins

!: Making Earrings With Beads, Ear Wire, and Eye Pins

It is quite easy to make earrings to coordinate with other jewellery pieces by using similar colours and beads. The hoop earring is the easiest, all you have to do is tread on the beads and attach the hoop to the ear wire. The dangling earring means making loops, but is also easy with a little practice.

You will need...
* Beads

* Earring hoop

* Ear wire

Step-by-step for hoop earrings

1 - Gently pull the wire at the top of the hoop until it clears the metal clasp and thread on the beads.

2 - Carefully replace the wire into the metal clasp at the top of the hoop.

3 - Open the loop of the ear wire and thread on the hoop. Close the loop of the ear wire.

Dangling Earrings

You will need...
* Beads

* Eye pins

* Head pins

* Ear wire

Step-by-step for dangling earrings

1 - Decide on the pattern of beads to be used.

2 - Thread the beads onto an eye pin or a head pin (an eye pin if you are going to attach another bead to it, a head pin if that is the last bead to dangle) and form a loop.
To make a loop
* Thread bead onto eye pin or head pin
* Using the flat nose pliers, bend the open end of the eyepin at right angles, as close to the bead as possible.
* Using the wire cutter, cut the bent end of the eyepin leaving approximately 6-7mm of wire. The length needed to form the loop depends on amount of wire needed to create a loop to match the loop already in place, at the other end.
* Using the round nose pliers, grab the very end of the bent end of the eyepin, about 5mm from the tip of the pliers. The exact position on the pliers depends on the size of loop required to match the loop already in place at the other end.
* Holding the tip of the wire, roll the pliers along the wire, forming a loop which is centered over the hole in the bead.

3 - Attach beads, in the chosen sequence, by opening the loop of one bead and attaching to the loop of the next bead.

4 - Finish by attaching the beads to the loop of the ear wire.


Making Earrings With Beads, Ear Wire, and Eye Pins

!: Help Skyscan Atomic Alarm Clock !: 5 Gallon Gatorade Cooler


Twitter Facebook Flickr RSS


Français Deutsch Italiano Português
Español 日本語 한국의 中国简体。